RabbitMQ는 다양한 언어를 지원하며 홈페이지에서 언어별 코드와 설명을 볼 수 있습니다. 오늘은 자바만 관심 있으므로 다른 언어는 신경 쓰지 않을 것입니다.
이클립스를 실행하여 Java Project를 만든 후 Maven Project로 전환합니다. 그리고 pom.xml에 dependency를 추가합니다.
<dependency>
	<groupId>com.rabbitmq</groupId>
	<artifactId>amqp-client</artifactId>
	<version>4.1.0</version>
</dependency>
홈페이지에 있는 튜토리얼을 영혼 없이 따라 해 봅니다.
https://www.rabbitmq.com/tutorials/tutorial-one-java.html
import java.io.IOException;
import java.util.concurrent.TimeoutException;

import com.rabbitmq.client.Channel;
import com.rabbitmq.client.Connection;
import com.rabbitmq.client.ConnectionFactory;

public class Publisher {

  private final static String QUEUE_NAME = "hello";

  public static void main(String[] args) throws IOException, TimeoutException {
    ConnectionFactory factory = new ConnectionFactory();
    factory.setHost("localhost");
    Connection connection = factory.newConnection();
    Channel channel = connection.createChannel();

    channel.queueDeclare(QUEUE_NAME, false, false, false, null);
    String message = "Hello World!";
    channel.basicPublish("", QUEUE_NAME, null, message.getBytes());
    System.out.println(" [x] Sent '" + message + "'");

    channel.close();
    connection.close();
  }

}
위 코드의 자세한 의미는 아직 모릅니다. 나중에 기회가 되면 더 살펴볼 생각이지만 지금은 그냥 넘어갑니다.
RabbitMQ 콘솔 (http://localhost:15672)을 실행합니다. Queues 탭을 열어 봅니다. 다른 탭이 여러 개 있지만 아직 의미 있는 데이터는 쌓이지 않은 것 같습니다.
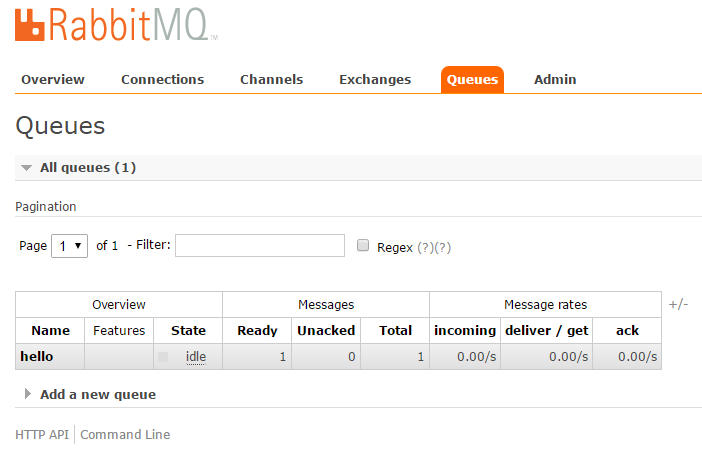
hello라는 이름의 큐(Queue)에 대기(Ready) 중인 메시지가 한 건 있습니다.
데이터를 큐에 넣었으니 다음은 꺼낼 차례입니다.
import java.io.IOException;
import java.util.concurrent.TimeoutException;

import com.rabbitmq.client.AMQP;
import com.rabbitmq.client.Channel;
import com.rabbitmq.client.Connection;
import com.rabbitmq.client.ConnectionFactory;
import com.rabbitmq.client.Consumer;
import com.rabbitmq.client.DefaultConsumer;
import com.rabbitmq.client.Envelope;

public class Receiver {

  private final static String QUEUE_NAME = "hello";

  public static void main(String[] argv) throws IOException, TimeoutException {
    ConnectionFactory factory = new ConnectionFactory();
    factory.setHost("localhost");
    Connection connection = factory.newConnection();
    Channel channel = connection.createChannel();

    channel.queueDeclare(QUEUE_NAME, false, false, false, null);
    System.out.println(" [*] Waiting for messages. To exit press CTRL+C");

    Consumer consumer = new DefaultConsumer(channel) {
      @Override
      public void handleDelivery(String consumerTag, Envelope envelope,
          AMQP.BasicProperties properties, byte[] body) throws IOException {
        String message = new String(body, "UTF-8");
        System.out.println(" [x] Received '" + message + "'");
      }
    };

    channel.basicConsume(QUEUE_NAME, true, consumer);
  }

}
위 코드를 실행하면 아까 큐에 넣은 메시지가 출력됩니다. 역시나 무슨 의미인지 모르지만 그냥 넘어갑니다.
영혼은 없지만 해 본 것으로 만족합니다.
아래 링크를 통해 RabbitMQ에서 기본으로 지원하는 AMQP 0-9-1 프로토콜을 개략적으로 살펴볼 수 있습니다.
https://www.rabbitmq.com/tutorials/amqp-concepts.html